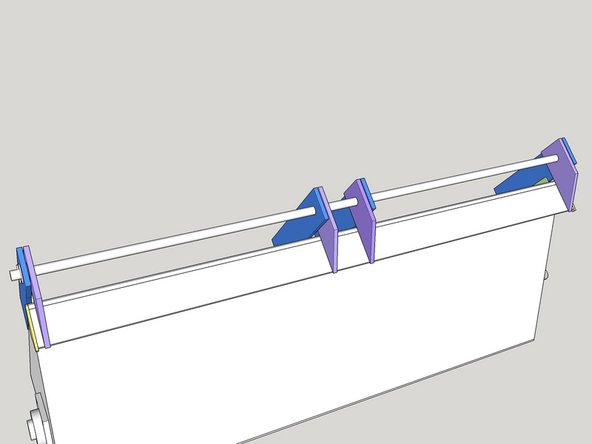
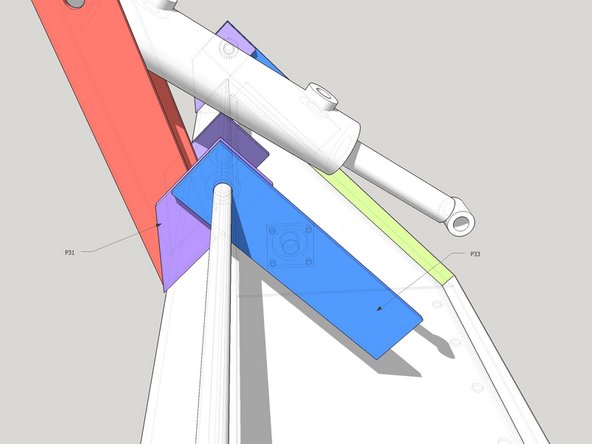
1. threading the rod back into the hinge, ensure the following list of parts are threaded onto the rod in order
    • threading the rod back into the hinge, ensure the following list of parts are threaded onto the rod in order

    • P31 (end already welded on), P33, a washer, P31, P11 , a washer, Cylinder base, a washer, P11, P31, a washer P33, P31 (end already welded on)

    • This is a temporary arrangement to get the hinge in place and centred. Later we will remove the cylinder, P11 parts, and the 2 washers between them.

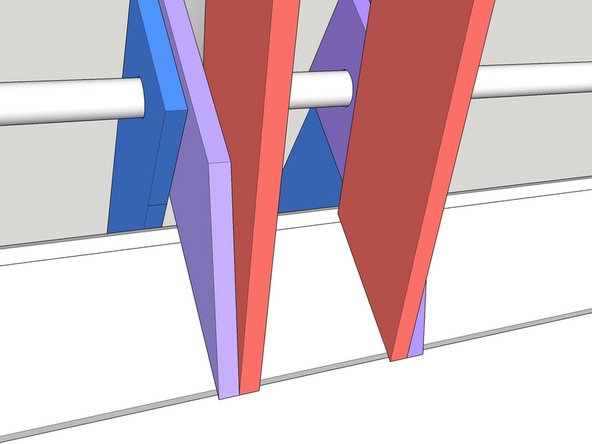
  2. Measure to centre the 2x P11 and 2x P31 parts along the QA Lip. the 2x P31 centre hinges should be aligned with the 2x P31 outer hinges along the QA Lip P10 Be careful in this stage not to weld any of the other parts as they need to be removed. only Tack (dont finish weld yet) the outer seams of the 2x P31 hinges onto the QA lip. Be careful in this stage not to weld any of the other parts as they need to be removed. only Tack (dont finish weld yet) the outer seams of the 2x P31 hinges onto the QA lip.
    • Measure to centre the 2x P11 and 2x P31 parts along the QA Lip. the 2x P31 centre hinges should be aligned with the 2x P31 outer hinges along the QA Lip P10

    • Be careful in this stage not to weld any of the other parts as they need to be removed. only Tack (dont finish weld yet) the outer seams of the 2x P31 hinges onto the QA lip.

  3. Carefully take out the shaft and remove the cylinder, P11 supports, and the 2 on the Cylinder. Place the shaft back in with the other parts still loose as they were before.
    • Carefully take out the shaft and remove the cylinder, P11 supports, and the 2 on the Cylinder. Place the shaft back in with the other parts still loose as they were before.

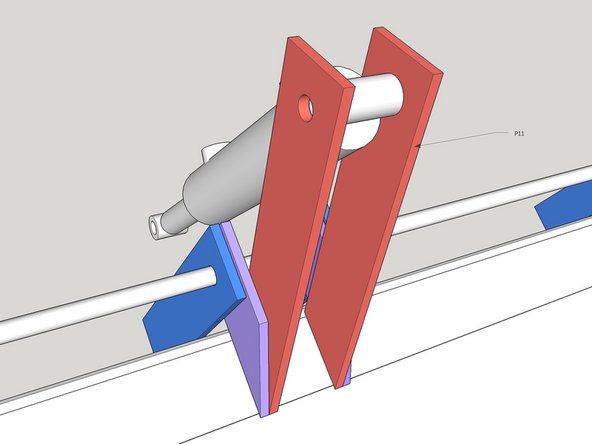
  4. Take the Hydraulic Cylinder Base and bolt inside the 2x P11 Cylinder supports. Use a washer between the cylinder and both P11 parts as before. Get someone to hold the cylinder base so the the very bottom edges of the P11 supports are aligned with the bottom edges of the P31 hinges and clamp them together (use 2x G-clamps) . leave enough clearance with the clamp to later weld on the seams.
    • Take the Hydraulic Cylinder Base and bolt inside the 2x P11 Cylinder supports. Use a washer between the cylinder and both P11 parts as before.

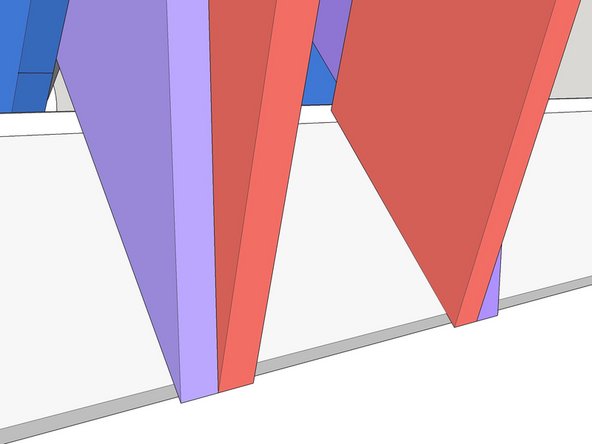
    • Get someone to hold the cylinder base so the the very bottom edges of the P11 supports are aligned with the bottom edges of the P31 hinges and clamp them together (use 2x G-clamps) . leave enough clearance with the clamp to later weld on the seams.

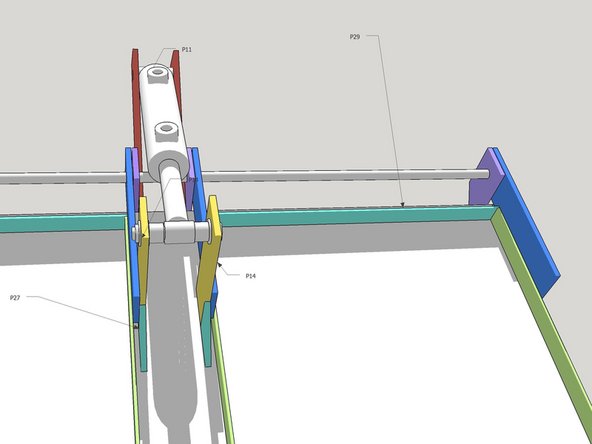
  5. Use a set square to ensure P11 and P31 are perpendicular to P10.
    • Use a set square to ensure P11 and P31 are perpendicular to P10.

    • Tack all seams between P11, P10, and P31.

    • Finish the welding the seams on these parts and remove the clamps

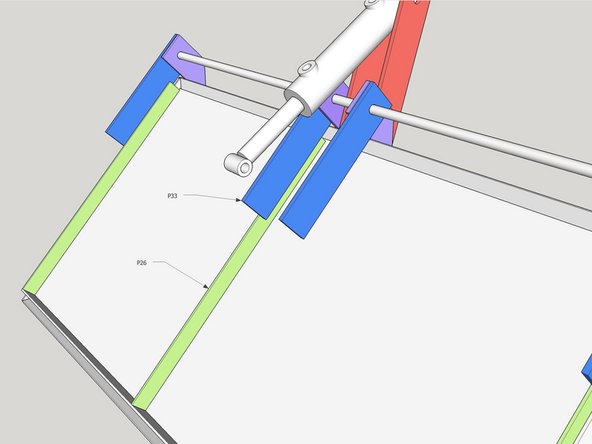
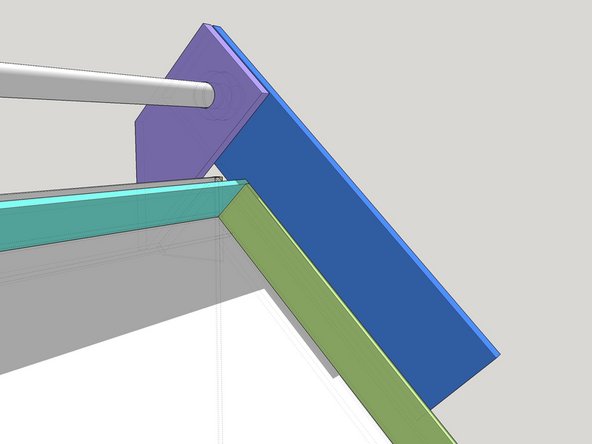
  6. Lightly clamp P33 onto P31 maintaining the 90 degree angle in the joint as in the diagram. Since there is a washer in between on the shaft, 2 clamps may be required to keep everything flat. Take one of the P33 parts and clamp to the middle p26 shaped piece. Place P26 Strut against the lid, ensure it is parallel with P33, and weld in place.
    • Lightly clamp P33 onto P31 maintaining the 90 degree angle in the joint as in the diagram. Since there is a washer in between on the shaft, 2 clamps may be required to keep everything flat.

    • Take one of the P33 parts and clamp to the middle p26 shaped piece. Place P26 Strut against the lid, ensure it is parallel with P33, and weld in place.

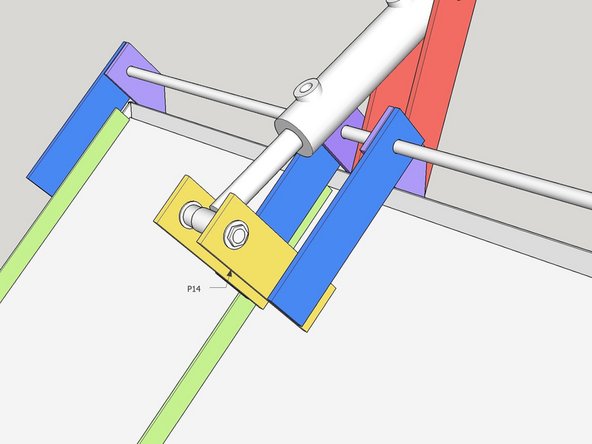
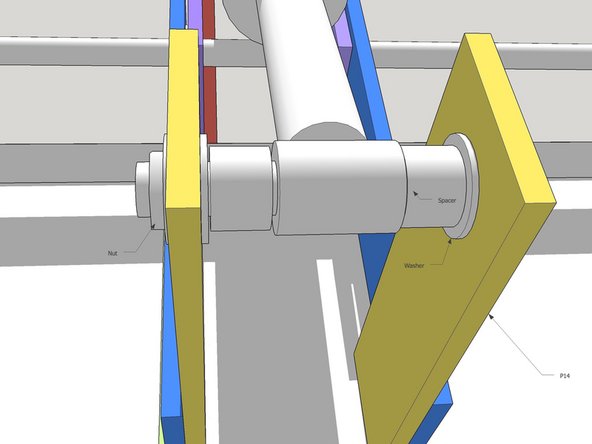
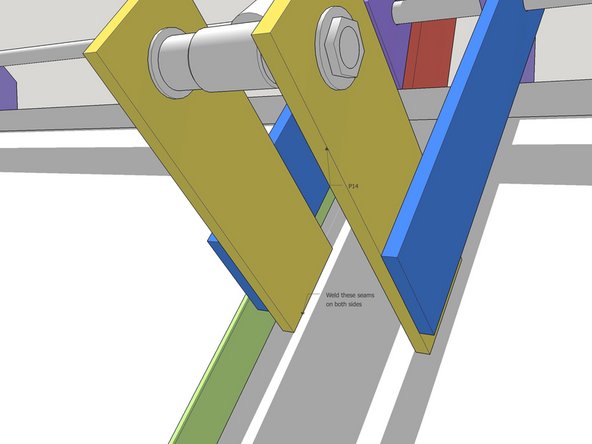
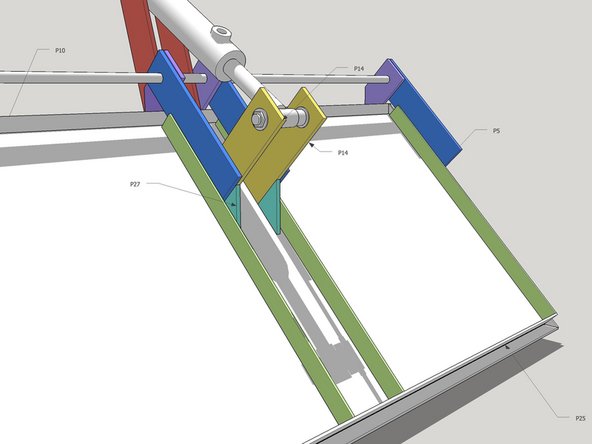
  7. Ensuring the Hydraulic cylinder is about 1/4" back from full extension (to ensure the lid can fully close, but we don't want it to continue to extend much after full closure), bolt 2x P14 cylinder struts on to the cylinder, along with the spacers and washers. There are washers on both sides of P14 Parts. Rotate the cylinder about the base etc to get the first P14 strut in position. it should be flat against the inside of P33. tack in place, ensure it is perpendicular to the lid with a set square and finish welding Rotate the cylinder about the base etc to get the first P14 strut in position. it should be flat against the inside of P33. tack in place, ensure it is perpendicular to the lid with a set square and finish welding
    • Ensuring the Hydraulic cylinder is about 1/4" back from full extension (to ensure the lid can fully close, but we don't want it to continue to extend much after full closure), bolt 2x P14 cylinder struts on to the cylinder, along with the spacers and washers. There are washers on both sides of P14 Parts.

    • Rotate the cylinder about the base etc to get the first P14 strut in position. it should be flat against the inside of P33. tack in place, ensure it is perpendicular to the lid with a set square and finish welding

  8. Repeat this process with the right side. Weld the 2x P27 Gussets in place against P14 and the P2 Lid. The 2x P29 pieces can now be tacked and welded onto the lid between the P26 Lid Struts and P33 Hinges.
    • Repeat this process with the right side.

    • Weld the 2x P27 Gussets in place against P14 and the P2 Lid.

    • The 2x P29 pieces can now be tacked and welded onto the lid between the P26 Lid Struts and P33 Hinges.

Finish Line

2 other people completed this guide.

Andrew Graham

Member since: 02/15/2014

197 Reputation

5 Guides authored

0 Comments

Add Comment

View Statistics:

Past 24 Hours: 0

Past 7 Days: 0

Past 30 Days: 2

All Time: 289