Difficulty
Moderate
Steps
3
Time Required
00:01:30
- Module 2a+b 3 steps

In Progress
This guide is currently being written. Reload periodically to see the latest changes.
Quiz
0
Introduction
We are going to break down the framing into 3 framing modules that will be assembled on the ground in parallel with other construction processes.
This is the how-to for the first modules of the 1st floor. Starting from the south, they are labeled 1-10 with an "a" and "b" distinction referencing their location on either west or east respectively.
-
-
Gather materials for Mod. 2a+b
-
4: 2"x4"x6' studs
-
3: 2"x4"x8'
-
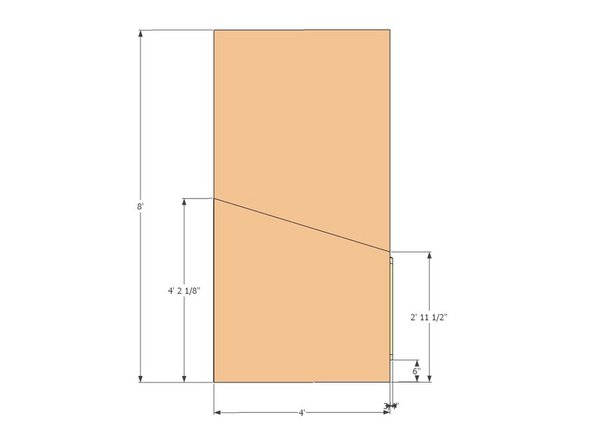
1: 3/4"x4'x8'
-
1: 1/2"x4'x8'
-
~20: 3-1/8" construction screw
-
~20: 1-5/8" coated deck screw
-
-
-
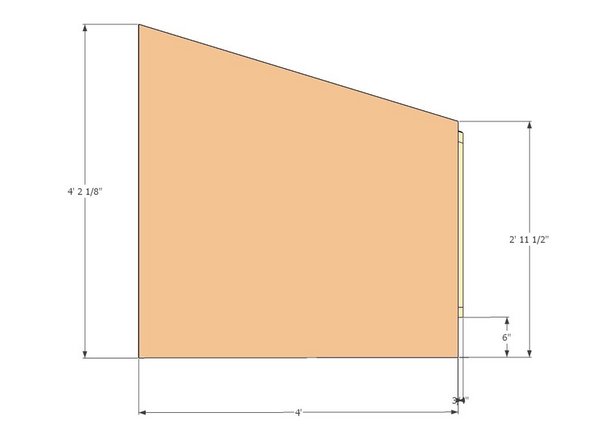
Use two people to make the proper cuts at the dimensions in the graphic at a 17 degree angle on the miter saw.
-
Simultaneously, use the other two people in your group to assemble the framing pieces using two 3-1/8" construction screws per connection, screwing perpendicular to the bottom plate and top diagonal pieces.
-
-
-
Exterior Sheathing for Module 2a
-