Difficulty
Moderate
Steps
5
Time Required
- CEB Simple Plates 5 steps

User-Contributed Guide
This guide is not managed by the site's staff.
Quiz
0
Introduction
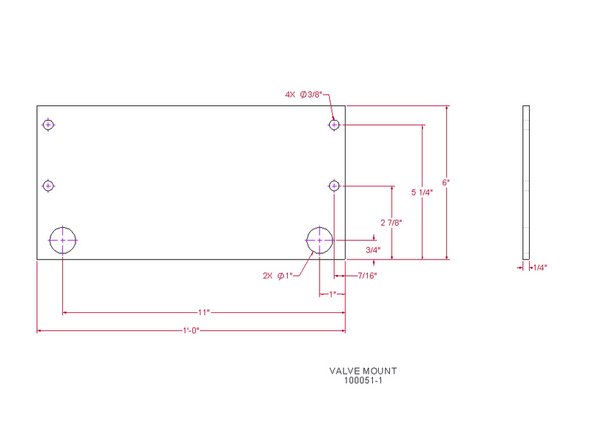
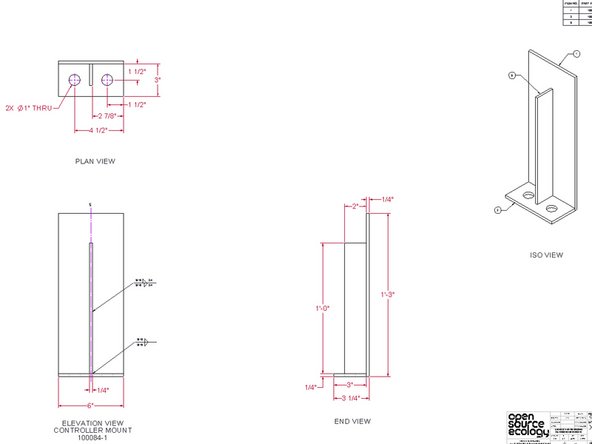
Materials Needed:Steel:* .25x2 Flat: 12” (1) – Controller Mount* .25x3 Flat: 6”(1) Controller Mount Bottom Piece* .25x6 Flat: 12” (1) Valve Mount* .25x6 Flat: 15” (1) Controller Mount* .125x29x13.5 Sheet (1) Dirt Keeper Plate* .125x29x17.5 Sheet (1) Brick Holder PlateSketchup Model
Tools
Parts
No parts specified.
-
-
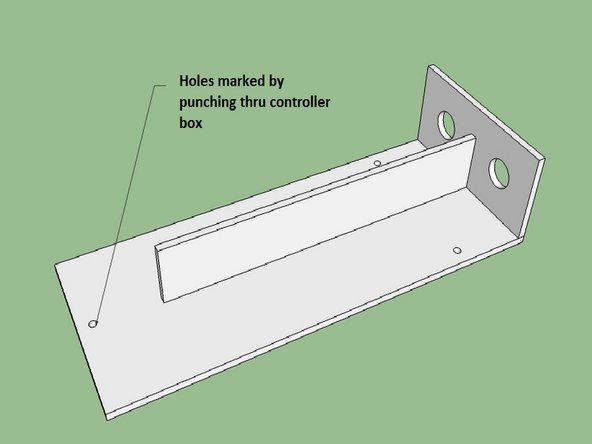
Find your controller box and locate its mounting holes on the back.
-
Place it on top of the 6x15 plate so it is square and the top hole is about ½” away from the top. Transfer punch the holes on the controller box to the plate.
-
Drill those 1/4" holes.
-
You can drill them a little bigger (up to 5/16") if you'd like, as it's difficult to get the holes perfectly aligned.
-
Punch the holes in the bottom piece.
-