-
-
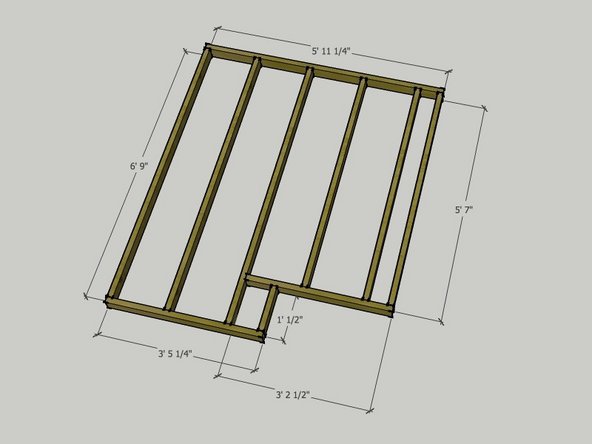
Review the images in this step to get an overview of what you are building. The first image shows the framing with dimensions. The second image gives you the context for how the modules look when the decking has been added and the modules are set next each other.
-
Note, the "notch" in the module on the right. It provides the place where people come up the ladder/stairs into the loft.
-
-
-
Next, we are creating the "rim joists." Two of these are used for the module w/o the notch, and one is used for the module with the notch.
-
Gather all three of your 5' - 11 1/4" boards together. Mark all three of them as you see in the image on the left.
-
ADD PICTURES SHOWING PROPER PROCEDURE FOR LAYOUT WITH A SPEED SQUARE AND TAPE MEASURE.
-
Put one of these back with the stack of pieces for the notched module. Keep the other two available for the next step.
-
-
-
Take your two boards with the layout marks on them and set them across from each other so that the marks line up.
-
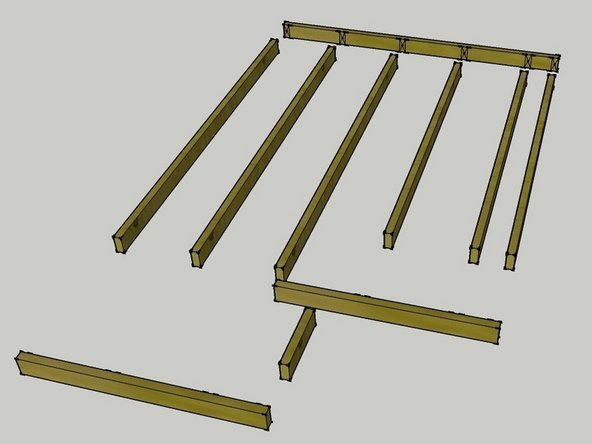
Lay your two pieces with the layout marks on them facing each other and lay your six 6' - 9" pieces in between, roughly in the position of the marks.
-
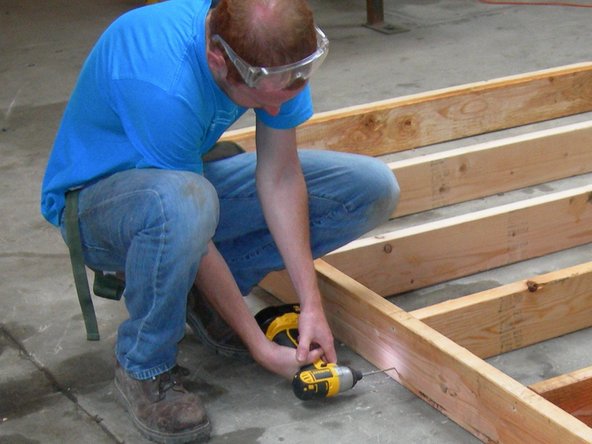
Pre-drill two holes from the outside at the ends of the board to avoid splitting as shown on the second photo of this step. (The pre-drilling is only necessary at the ends of the board, not in the middle.) Screw (or nail, if you choose) the pieces into position.
-
ADD IMAGE SHOWING THE DRILLING AT THE ENDS. THE SECOND IMAGE SHOWS SCREWING IN THE MIDDLE, SO THE LANGUAGE AND THE PICTURE DON"T LINE UP RIGHT NOW.
-
-
-
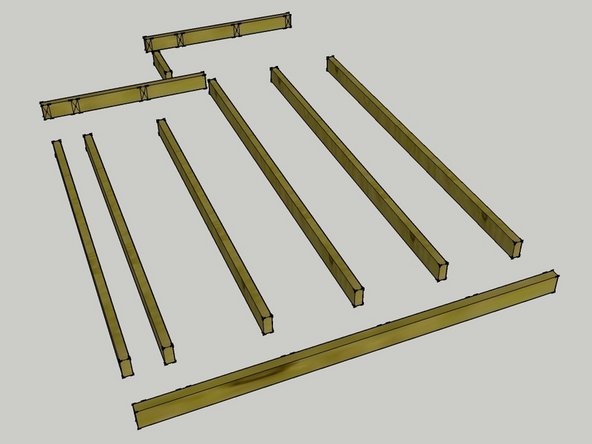
For the module with the notch, one of the rim joists was laid out identically to the two that you just used. This one is shown in position in the first image.
-
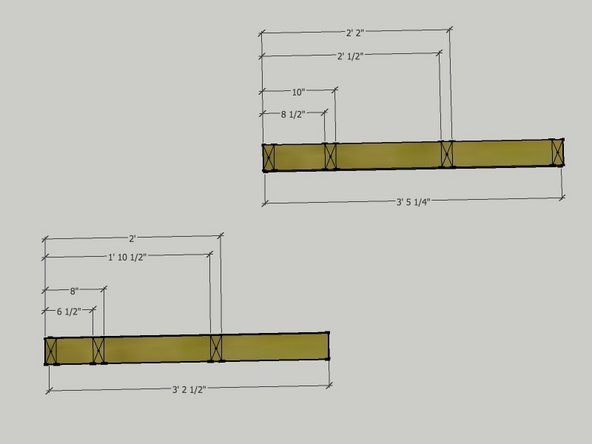
For the other side, we need to create layout marks on the two shorter rim joists. These are shown in the second image.
-
The third image shows the dimensions for the layout marks. Mark up your 3' - 5 1/4" piece and your 3' - 2 1/2" piece as shown in the drawing.
-
-
-
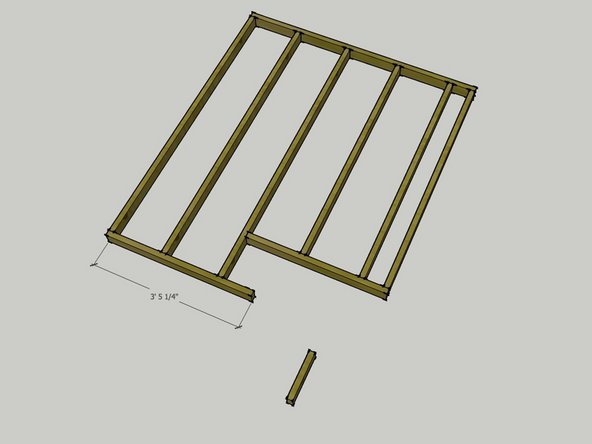
First, you will attach the three 6' - 9" pieces and the three, shorter 5' - 7" pieces to the rim joist as shown in the first image.
-
Then, attach the 3' - 2 1/2" rim piece as shown in the second image.
-
Next, attach the 3' - 5 1/4" rim piece as shown in the third image.
-
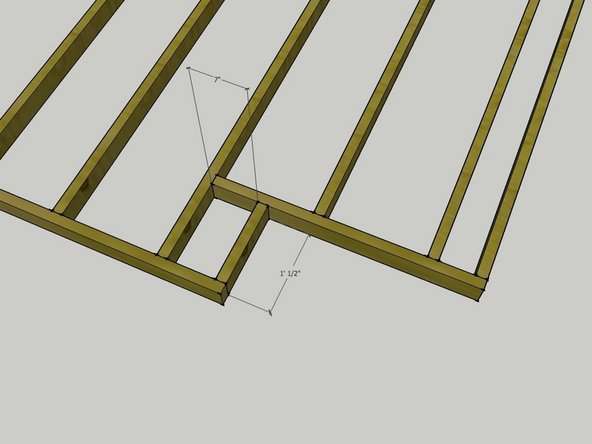
Now all that remains to finish this framing is to add the little piece!
-
-
-
Attach the small piece into the rim framing. The 7" dimension in the drawing shows how far away from the next joist the small block is. Use this measurement to ensure that you attach the small block properly.
-
SHOW IMAGE THAT CALLS OUT TWO SCREWS THROUGH THE RAFTER AND INTO THE SHORT RIM PIECE ON THE RIGHT.
-
You're ready to move on to the Loft Module Decking Guide!
-