Difficulty
Moderate
Steps
3
Time Required
- Prepare the Hopper Sheet Metal 3 steps

User-Contributed Guide
This guide is not managed by the site's staff.
Quiz
0
Introduction
Sketchup ModelAdditional Materials Required:* Hinges (12)* 1/2"x1" Bolts (12)* 1/2" Nuts (12)* 1/2" Washers (12)
Parts
No parts specified.
-
-
Punch holes in 4 of the hinge plates as shown with a 7/8" or 1" punch.
-
Weld one plate with holes, one without holes, and 3 hinges together as shown, with the plates 1 1/8" apart and the hinge centered.
-
Make sure the side of the hinge that sticks out most is on the top; this way it won't interfere with the hopper metal below when installing the hopper.
-
Make 3 more of these.
-
-
-
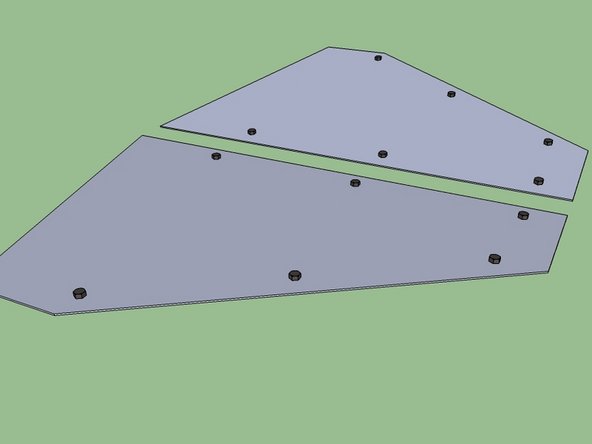
Torch the holes shown in the front piece.
-
Punch all of the holes shown in the side pieces and dirt deflector plate.
-
-
-
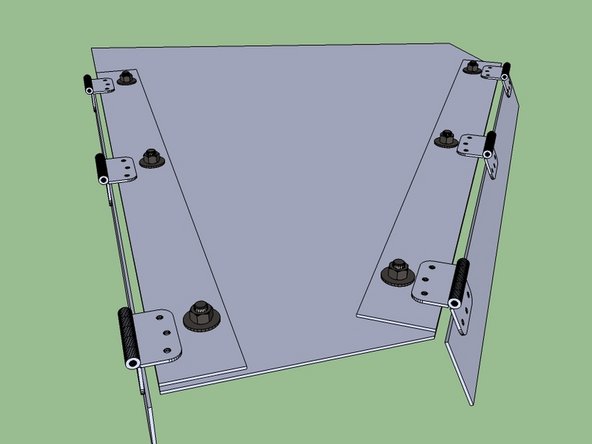
Place 1/2" bolts thru the side pieces and weld them.
-
Make sure you are making them mirror images of eachother.
-
Bolt the hinge plate assemblies to the side pieces using a washer, lock washer, and nut on each bolt
-