Difficulty
Moderate
Steps
3
Time Required
00:01:30
- Module 5a+b 3 steps

In Progress
This guide is currently being written. Reload periodically to see the latest changes.

Private
This guide will not appear in search results and can only be viewed by team members!
Quiz
0
Introduction
We are going to break down the framing into 11 framing modules that will be assembled on the ground in parallel with other construction processes.
This is the how-to for the modules of the 2nd floor. Starting from the south, they are labeled 4-9 with an "a" and "b" distinction referencing their location on either west or east respectively.
-
-
Gather materials for Mod. 5a+b
-
2: 2x4x8'
-
2: 2x4x10'
-
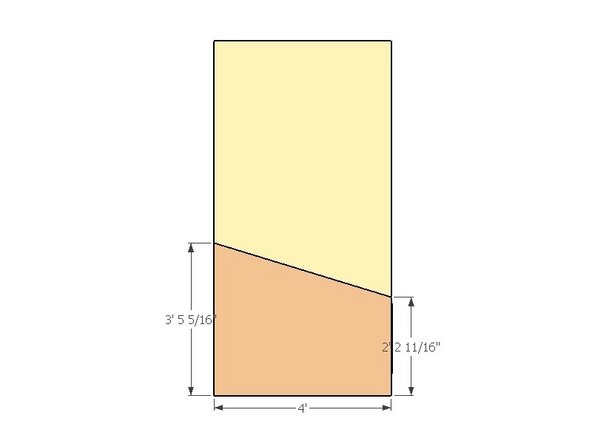
1: 1/2"x4x8 Plywood
-
1: 3/4"x4x8 OSB
-
~16: 3-1/8" construction screw
-
~16: 1-5/8" coated deck screw
-
-
-
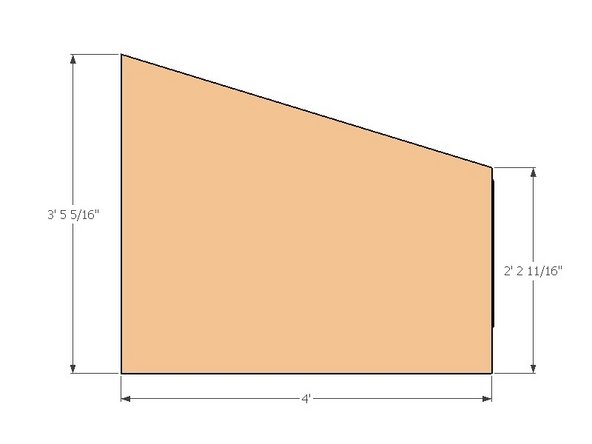
Use two people to make the proper cuts at the dimensions in the graphic at a 17 degree angle on the miter saw.
-
Simultaneously, use the other two people in your group to assemble the framing pieces using two 3-1/8" construction screws per connection, screwing perpendicular to the bottom plate and top diagonal pieces.
-
-
-
Exterior Sheathing for Module 5a
-