Introduction
Download the Sketchup (skp) file of the MH 2 Window Module here: http://opensourceecology.org/wiki/File:M...
Use the scene tabs at the top in the model to see the various steps in the assembly, the full module, or the cut pieces.
-
-
Take a look at the full window module so that you are familiar with what you are about to build.
-
-
-
Create the plywood pieces for the module.
-
Begin by ripping the 5/8" plywood into 12" wide strips on the table saw.
-
Then, cut your strips to length as shown in the image.
-
The four strips shown in the image are for one module. Since we'll be building two modules, you will need to make two sets of these pieces.
-
-
-
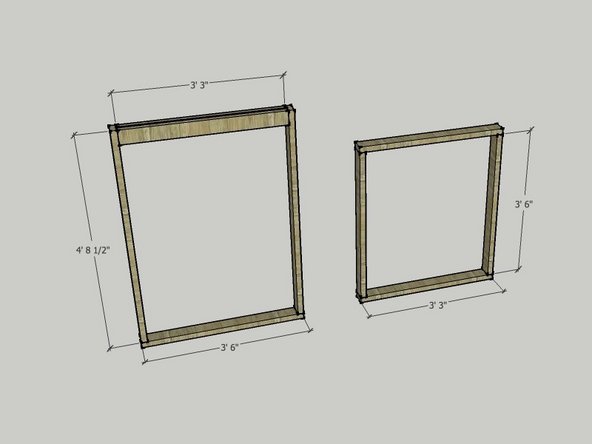
The image shows the dimensions of the various framing pieces.
-
CUT LIST for 2x4s:
-
2 @ 4' - 8 1/2"
-
3 @ 3' - 6"
-
4 @ 3' - 3"
-
Since you are making two of these modules, make a second set of the pieces listed above.
-
Helpful note: write the length of the pieces on them! This way you know you are using the right pieces as you assemble the unit. The framing will all be buried under finish materials later, so you don't have to worry about marking up the boards.
-
-
-
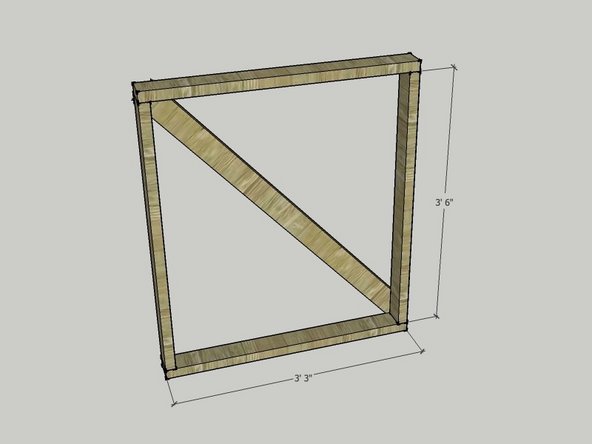
Build the small box as shown in Image 1 at left.
-
You will be screwing through the 3' - 3" boards and into the 3' - 6" boards. Pre-drill two holes through each end of the 3' - 3" boards so that you don't split them. Use 3" long screws for the attachments.
-
Once all four pieces are attached together, square the frame by measuring the two diagonals and making adjustments until they are equal. Then, brace the frame by screwing a diagonal piece onto the back as shown. Double-check your diagonals and make sure that the frame did not come out of square as you braced it.
-
-
-
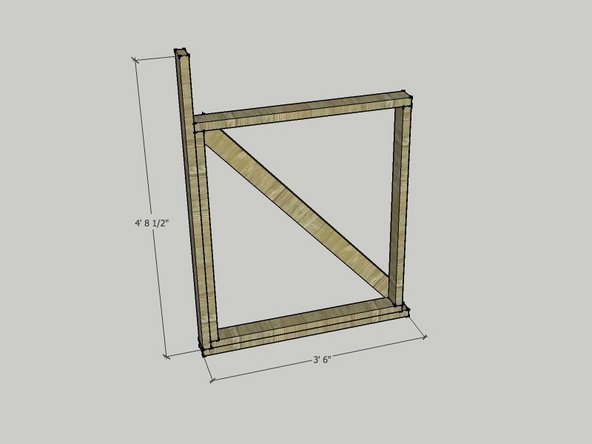
Attach one of your long boards to one side and one of your 3' - 6" boards to the bottom of your small square frame. Screw this in with pairs of screws at the bottom, the top, and in the middle.
-
Note the way the pieces come together at the corner. The 3' - 6" board projects past the small frame that you built in the previous step by 1 1/2" on each side. The long board that goes up the side then meets flush with the butt of the the board across the bottom.
-
-
-
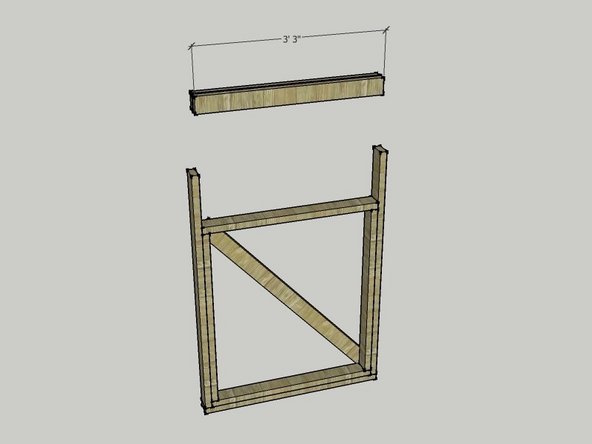
Add a second long board to the other side of your assembly. It should come flush with the other butt of the board running across the bottom.
-
Build a header that will slide into the top of the frame as shown in the image. This is made with two 3' - 3" boards sandwiched around scraps of 1/2" sheet material. Screw this all together with pairs of 3" screws at both ends and a pair in the middle.
-