Difficulty
Moderate
Steps
6
Time Required
02:00:00
- Fitting the Main Cylinder 6 steps

User-Contributed Guide
This guide is not managed by the site's staff.
Quiz
0
Introduction
I really reccomend you watch the instructional video:
Sketchup ModelYou need to fit the cylinder into the frame so that when it is fully extended, the press foot is in the correct spot to eject the brick. You will need to torch holes in the horizontals for the pin which goes thru the cylinder, and weld DOM tubing to hold the pin.
Video Overview
-
-
Lay the frame down, with all of the crossmembers and drawer members in place except the upper crossmember and drawer member which are facing up.
-
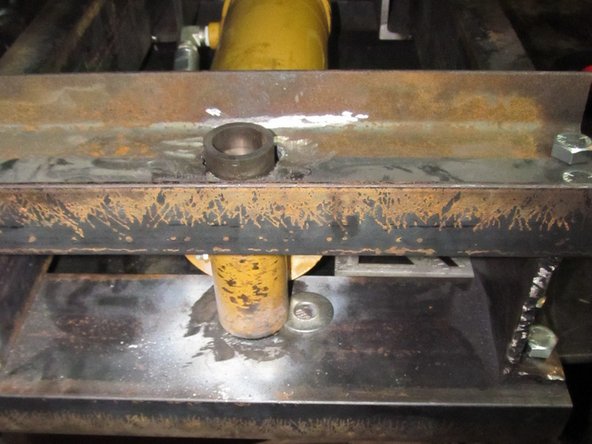
Place the assembled cylinder lying down so that the press feet are between the spacers. You need to insure that the vertical height is correct, and that the cylinder is centered.
-
Insure the magnet holder nut (welded to the press feet) is on the same side as the sensor holder hole (hole in one vertical).
-
The top of the upper press foot should be (4 3/4" for normal)(6 3/4" for monster) away from the bottom of the upper crossmembers.
-
-
-
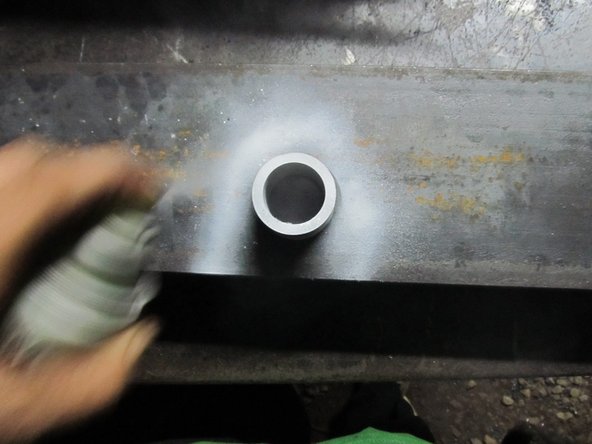
Add a 1/8" spacer (big washers work great) under the cylinder, where it contacts the lower crossmember. This insures the cylinder is centered vertically. Where to put it is circled in the first image.
-
Make sure the cylinder is centered, using a speed square pressed against the side of the cylinder, and a tape measure to the to the vertical members as shown.
-
Make sure the tubing for the pin is square with the lower crossmember using a speed square.
-
-
-
Mark the location for the hole for the pin on the bottom horizontal member using spray paint.
-
Put the top member on, and put in at least 3 bolts. Spray mark this location as well, from the other side.
-
Remove the horizontal members from the frame.
-
This is possible to do without removing the cylinder, just prop it up on something to remove the lower member.
-
Place one of the DOM tubing pieces in the center of each of the sprayed marks and spray paint around this to mark where you will torch.
-
-
-
Torch out the hole, and grind away the slag.
-
Insure the tubing will go thru each hole. If not, retorch it. Grind off the slag.
-
Lay the cylinder back down, with the 1/8" spacer in, and replace the crossmembers, with their bolts. Place the tubing in the torched holes.
-
Insure the pin will go thru the tubing and the cylinder. If not, retorch the holes so that it will.
-
-
-
With the pin held in, tack the tubing on the top in place.
-
Make sure the tubing is pressed up against the cylinder, that is that its as far into the hole as possible.
-
Youll want to tack it in many places before welding around it, at least 8 on each side.
-
Tack it as best you can on the bottom by hanging the frame off of the table and overhead welding. Again, insure the tubing is pressed up against the cylinder.
-
Remove cylinder and pin, as well as the two crossmembers.
-
Fully weld the tubing on both sides. Jump around a lot to minimize any warping on the tubing.
-
Block the insides of the tubing so no spatter goes inside. Big washers work well for this.
-
-
-
Replace the crossmembers and the cylinder.
-
Insure the pin still fits and hammer it thru.
-
If the pin doesn't fit, you will need to make it fit.
-
Tighten the bolts on only the bottom crossmember. Put the pin thru the crossmembers and the tube.
-
Mark where the bolt holes need to be torched away for the bolts to fit through. Torch it and you're done.
-