Difficulty
Moderate
Steps
5
Time Required
02:00:00
- How to Construct the Bucket 5 steps

In Progress
This guide is currently being written. Reload periodically to see the latest changes.
Quiz
0
Introduction
All plates are 1/2" steel plates.
Parts
No parts specified.
-
-
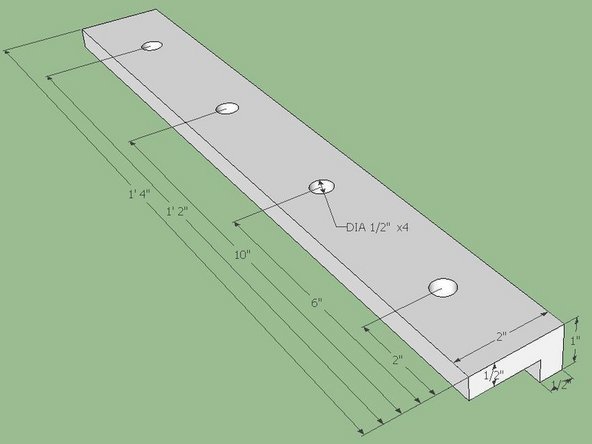
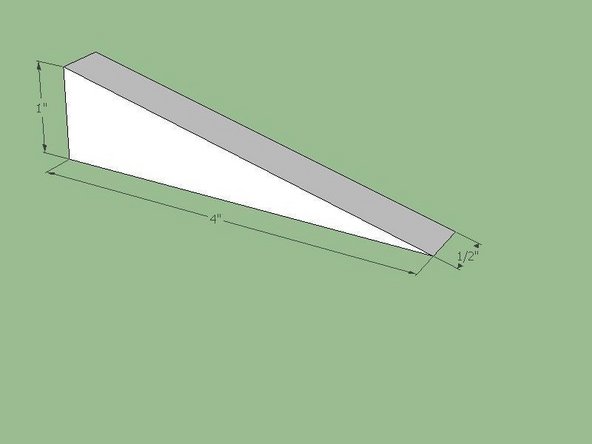
Start with two plates cut according to the dimensions in the Fig. The large piece in the center is called a “Bucket Side Plate”. Two are required to complete the Bucket. The two smaller triangles at the bottom were designed to be 30/60/90 triangles. The 30/60/90 triangles should control/drive the linear dimensions.
-
-
-
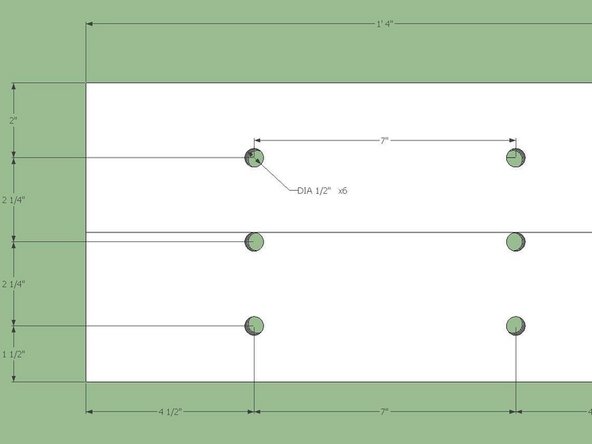
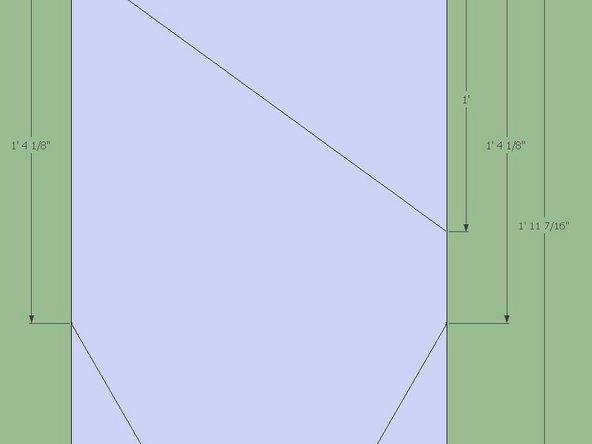
Cut a single 8"x16" plate according to the dimensions in the Fig. below.
-
Note: that the holes are centered horizontally but are not centered vertically.
-
-
-
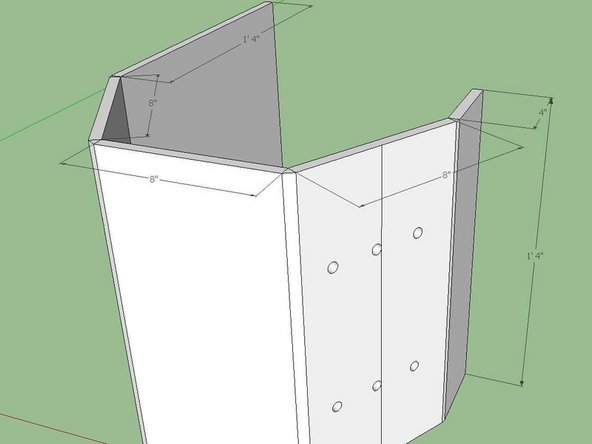
Acquire two ½” thick steel plates that are 8”x16”, one plate that is 4”x16”, and one plate that is a 16” square.
-
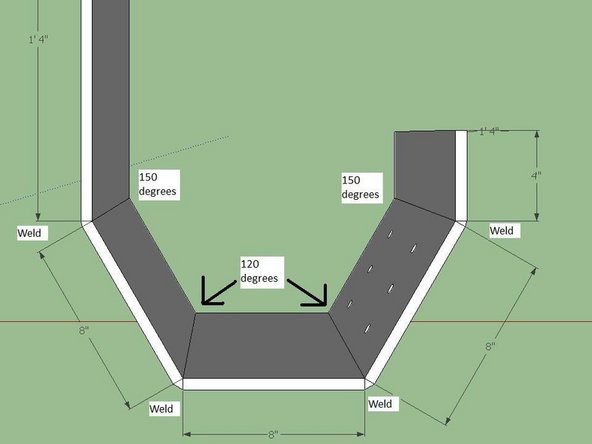
The plates will be welded together as shown in the Figs. below. The angles of the plates are symmetrical.
-
From the square plate to the adjacent plate (the plate without holes) the angle is 150 degrees. From the 4” plate to its adjacent plate (the plate with holes) is also 150 degrees. From the remaining 8”x16” plate to the two adjacent plates the two angles are 120 degrees.
-
The plate with the holes must be oriented properly. The side with of the plate with two holes must be attached to the 8” plate. The side of the plate with one hole must be attached to the 4” plate.
-
Once all the plates are welded together the component is called the “Bucket Body”.
-
-
-
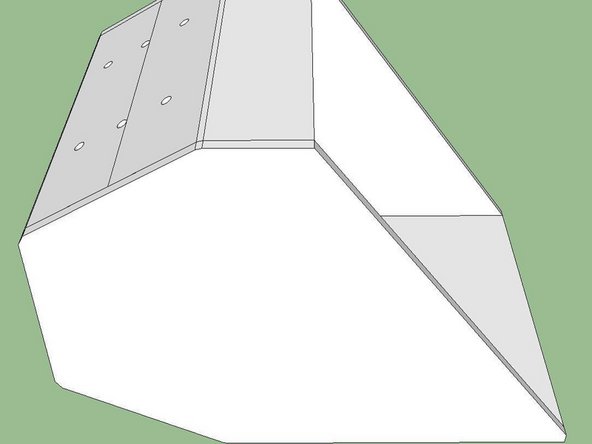
Assemble and weld the two Bucket Side Plates onto both sides of the Bucket Body. Optionally the corners may be ground smooth. Once welded together the component is called the “Bucket”.
-
-
-
Cut an piece of angle iron according to the dimensions shown.
-