Difficulty
Moderate
Steps
6
Time Required
- Utility 6 steps

In Progress
This guide is currently being written. Reload periodically to see the latest changes.
Quiz
0
-
-
This is what the utility module will look like from the kitchen and from the bathroom sides.
-
-
-
This image shows the frame and lists the materials counts to construct the frame, including the sheathing material.
-
Note that the image shows a duplicate entry for number number of 2x6s needed. The number needed is 7. Refer to the materials list at the top of this guide.
-
-
-
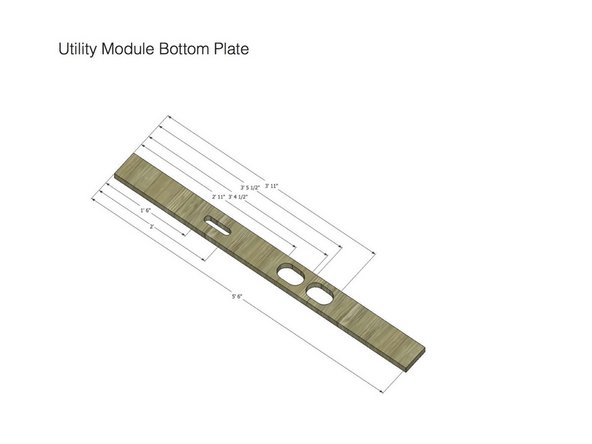
Use these dimensions to layout and make the bottom plate - it contains the openings for the pipes that come up and connect into the utility module.
-
The large slots are for 2" pipes, so it is best to make them 3" wide. The small slot is for a 1" pipe, so it is best to make it 2" wide.
-
-
-
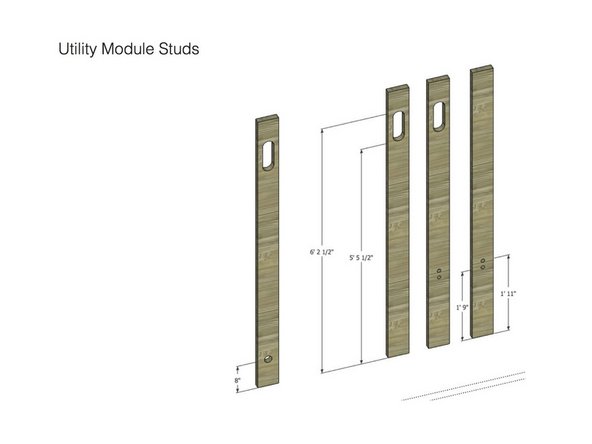
These images show the layout pattern for the studs of the utility module.
-
-
-
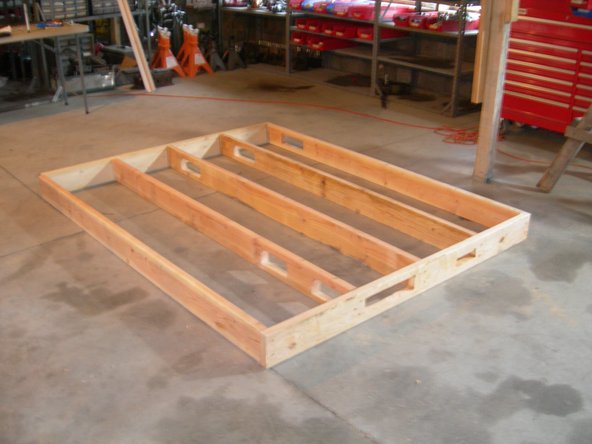
This is what the utility module frame will look like when you have it assembled. It is now ready for adding the sheathing to the bathroom side.
-
-
-
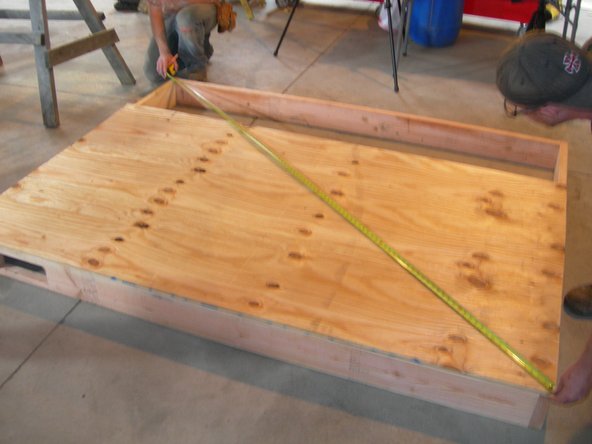
Before screwing down the sheathing, double-check to make sure that frame is square by measuring the diagonals.
-
Once the diagonals measure the same, screw on the sheathing. Then, check the diagonal measurements one more time to make sure that the frame did not shift while you were screwing on the sheathing.
-