-
-
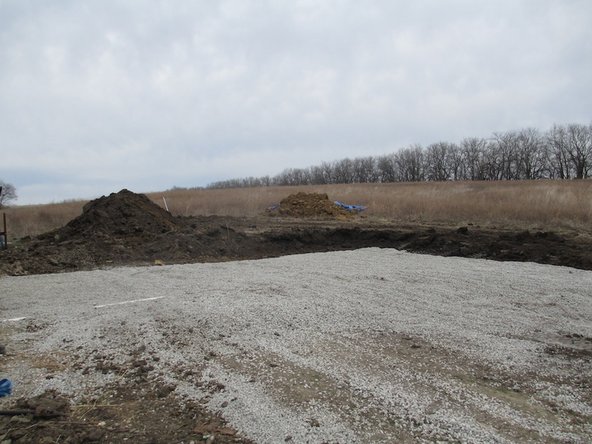
Clear vegetation from the site. We used the OSE pulverizer on the Life Trac 6.
-
You can strip off the topsoil, as well, or otherwise change the grade at this point. In our case, we had little topsoil and we liked the way the grade worked out by raising the building up on the gravel.
-
Cut down vegetation in a wide area around your building site, as well. 20' beyond where the gravel will be should be adequate. You will need room for the brick press and rollers, and to stage other materials, too. You will also need room for people to move around and work.
-
-
-
The foundation from our first module has rebar projecting in all four directions to accommodate expanding in any direction that we wanted to.
-
Our next additions will not have rebar projecting in all directions because the design for the total build-out has been determined.
-
If one was to add on to a side of a foundation without rebar projections, one could use a long masonry bit and a hammer drill to create holes into the existing foundation. Then, rebar can be inserted into the holes and construction adhesive can be used to secure the rebar into place.
-
-
-
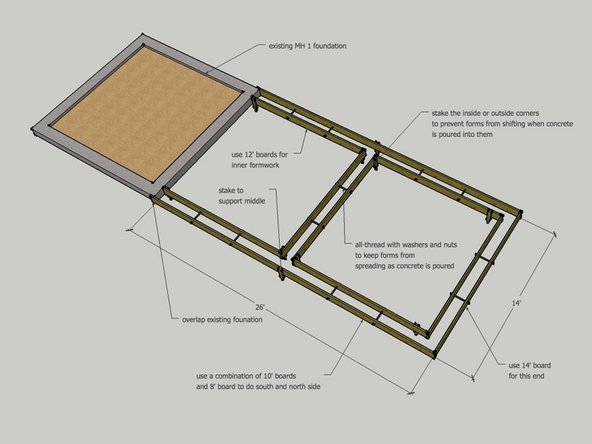
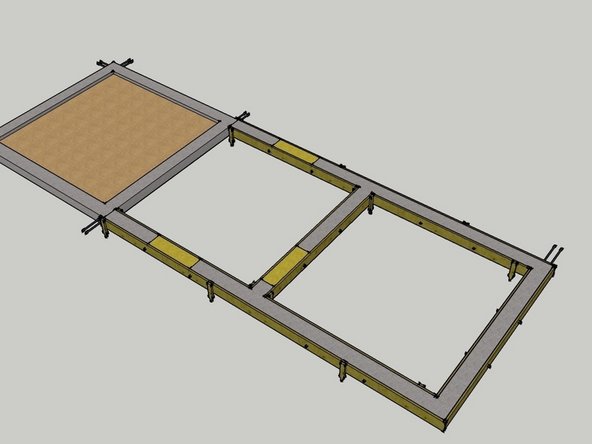
Review the drawing at left for an overview of what you are about to build.
-
Use cut list to order all the wood, rebar, and threaded rod. Order the lumber in the appropriate size sections.
-
Cut required, and number of pieces in brackets - for 2"x10" lumber:
-
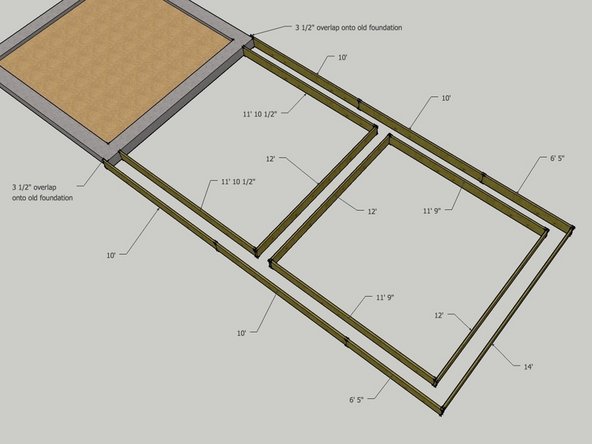
[2] 11' - 10 1/2" from 12' lumber
-
[2] 11' - 9" from 12' lumber
-
[2] 6' - 5" from 8' lumber
-
Cut list for 1/2' rebar stakes (option in lieu of wood stakes and allthread):
-
[42] 30" long, [12] 14" long
-
-
-
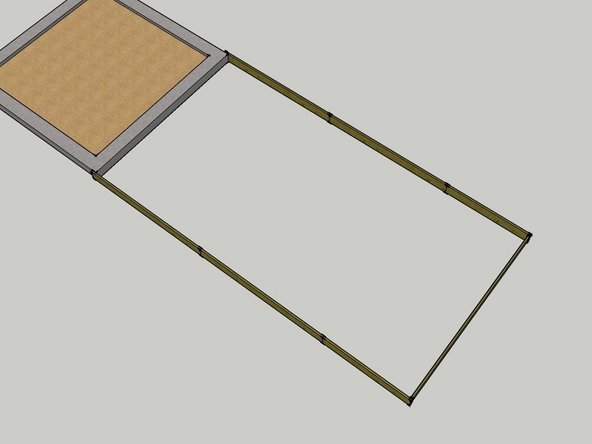
Start by building the external frame. Toe-nail the boards together to create the long sides.
-
The 14' long board is placed between the two long sides, as shown in the close-up of the corner in the second image.
-
Once the external frame is built, measure the two long diagonals and adjust the frame until they are equal to square the assembly. Also make sure that the length from the existing foundation to the inner edge of the end is 26'.
-
-
-
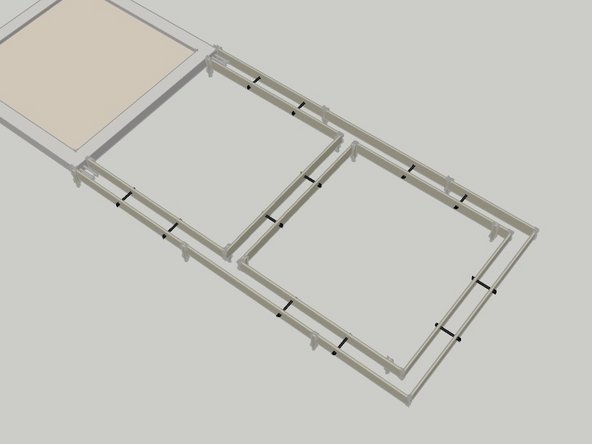
The image shows the cut list for the foundation module. You can also link to it and print it out here
-
Cut the 2x10 boards to the lengths shown in Image 1 or on the cut list in the link above.
-
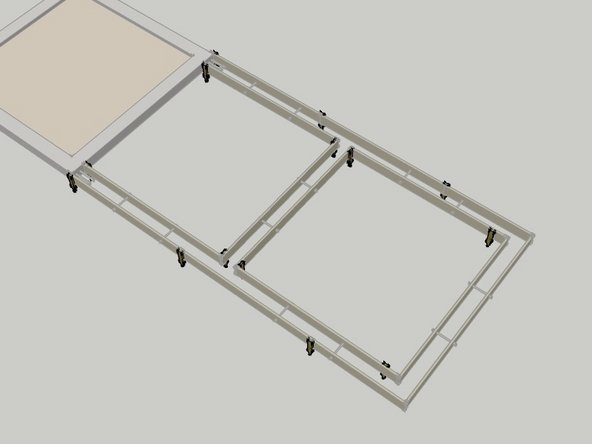
Also cut 12 pieces of all-thread to 18" in length. These will be positioned through the forms as shown in Image 2. The all-thread will go at the 1/3 points on each side of the module. This means at the 4' and 8' points along each wall, you will drill 5/8" holes halfway up the height of your form boards to feed the all-thread through.
-
All-thread will be slipped through these holes and have washers and nuts added from the outside. This will keep the form boards from spreading when the concrete is poured into the forms. It also provides a convenient support for the long lengths of rebar that reinforce the concrete.
-
Make 14 wooden stakes about 20" long - this is a great way to put your scrap end cuts from other projects to good use! You can also use metal stakes that are specifically made for retaining concrete forms.
-
NOTE! If your overlap of the outside form board on the foundation module you are connecting to is not exactly 3 1/2", then the 6' 5" board will not come out to the right length.
-
-
-
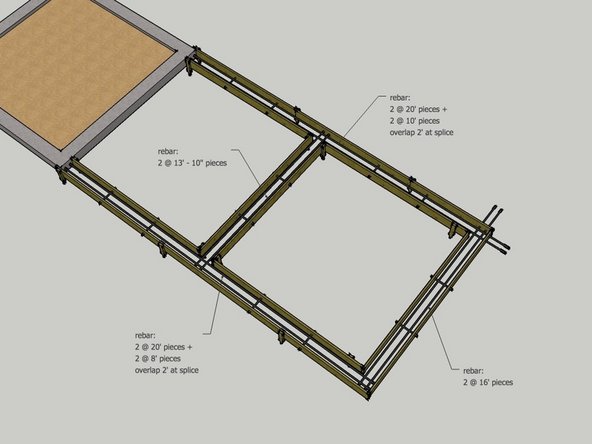
Once you have the forms staked and the all-thread in place, you can lay the long pieces of rebar into the forms. These pieces rest on the all-thread which holds them halfway up the thickness of the foundation.
-
The rebar should be placed at the 1/3 points side-to-side of the foundation. Since the foundation is 12" wide, this means that the rebar is located 4" in from each side.
-
Tying the rebar to the all-thread with metal wire will hold it in place and make sure it does not get moved around as the concrete is poured. Also, use metal wire to tie the rebar to the stubs coming off of the module you are adding on to.
-
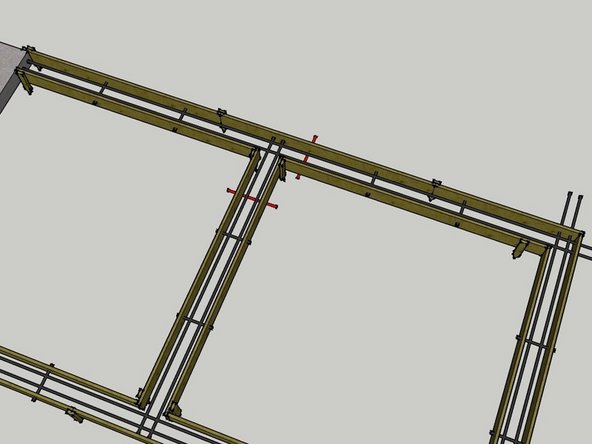
Add electrical chases made of 1" or larger PVC pipe. Tape the ends of the pipe so that debris does not clog them before they need to be used. Locations are shown in Image 2 - chases are highlighted in red.
-
-
-
Insert two electrical chases as shown in red in the image. These go underneath the foundation to allow electrical wires to be pulled through later.
-
NOTE: Chases should be minimum of 1" diameter pipe.
-
NOTE: Make sure to tape off the ends of the pipes so that they do not get clogged with debris before you need to use them.
-
-
-
We need to create a recess in the foundation where the door module will go. This allows the finish floor level to be slightly lower than the foundation, which keeps the CEBs elevated above the finish floor. This also will match the finish floor level of the MH 1 module.
-
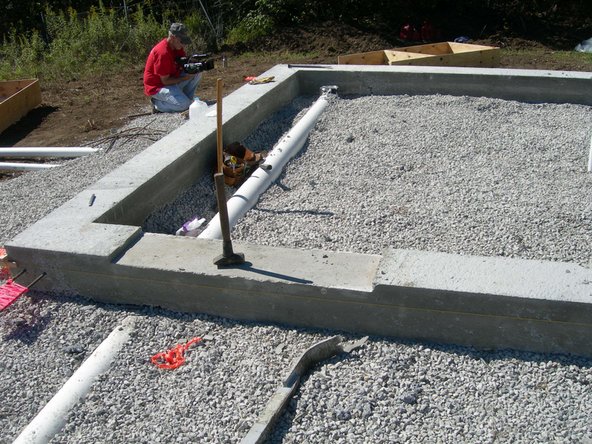
Image 1 shows the recess made for the door in the MH 1 foundation module.
-
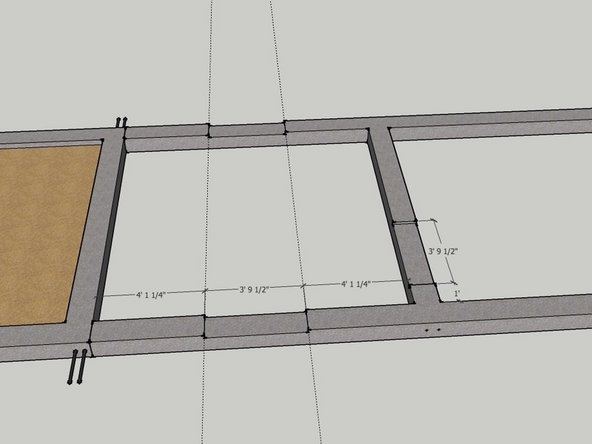
Image 2 shows the dimension for the location of the door recesses in the foundation.
-
See to next step for how to create the caps for this purpose.
-
-
-
Create three "caps" using one of the methods shown in the image.
-
Cut one piece of OSB to size, then reinforce with 2 long 2x4s laying flat on the outer edges. The 2x4 pieces should be 3' 9 1/2" long. Fill in blocks in between the long 2x4s. Screw in two more 2x4, 15" long, on top of the long edge 2x4s - to create effective handles. The project past the edge and come to rest on the foundation forms.
-
Alternative method is to layer up three sheets of 1/2" OSB or plywood.
-
-
-
Pour the concrete into the forms. Then, place your caps for the door recesses into place and level the top of the concrete using a board to screed off the excess.
-
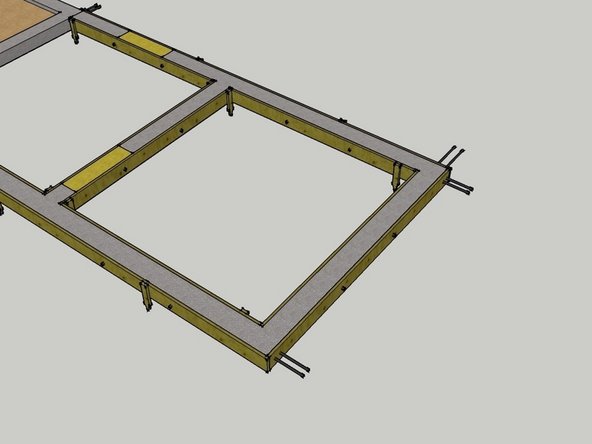
The image shows what you will have created once the concrete is poured into the forms.
-
You may have chosen to place additional stub-outs of rebar as shown in the second image or in other places. If you do, the holes for these pieces of rebar will be located like the other stub-outs: 4" apart from each other and 4" in from each edge of the foundation formwork.
-
NOTE: For our build, we'll be using stub-outs from the north-east corner only.
-
Cancel: I did not complete this guide.
3 other people completed this guide.


